
4–8 Week Sessions: Plan a Back Piece Tattoo That Fits Your Shape
A back piece tattoo is a large-scale design covering part or all of the back, built as one composition rather than a collection of unrelated images. Getting one right starts with choosing a style suited to the back’s shape, then booking a consultation where a tattoo artist maps the design to your body. Expect several sessions, months of healing between them, and a budget that scales with size, color, and detail.
TL;DR:
Choosing a style that integrates flow and negative space is crucial for ensuring a cohesive look on the back’s flat, wide surface.
Testing placement with a stencil in different positions and clothing helps prevent awkward design shifts during movement or daily activities.
Large back pieces typically require multiple sessions spaced four to eight weeks apart, with healing considered an integral part of the design process.
Pain intensity varies by zone, with bony areas like the spine and ribs being more uncomfortable, and costs depend heavily on style complexity, color, and artist reputation.
Table of Contents
Back Piece Tattoo Inspiration: Which Style Actually Fits the Back?
The back rewards styles built around flow and negative space, not busy, disconnected imagery. Its flat, wide surface and central spine axis make it one of the few places on the body that can carry a genuinely large standalone composition or a linked series of scenes, which is exactly why full and partial back tattoo galleries dominate so much of the design research people do before booking.
Here’s how the most requested styles perform on that canvas:
Japanese/irezumi: Built for the back historically, with waves, wind bars, and clouds that connect separate figures (koi, dragons, tigers) into one flowing scene.
Mandala/ornamental: Strong for spine-centered symmetry; works well on upper or lower back alone without needing the full canvas.
Black & grey realism: Excellent for portraits or nature scenes with depth, but demands more session time to build smooth gradients across large muscle areas.
Color realism: The most visually striking option and the most session-intensive, since color saturation on skin needs layered passes to hold up over years.
Tribal/blackwork: Reads cleanly at a distance and ages well, since bold linework is more forgiving than fine detail as skin changes.
Biomechanical/neo-traditional: Uses the back’s musculature and shoulder blade ridges as part of the design, so the body itself becomes part of the composition.
Color complexity and shading depth are the two biggest drivers of extra sessions, so factor that into your style choice, not just the visual you like most.
Planning Your Composition: Full Back vs. Partial and Testing Placement
Size decisions come before style decisions in practice, even though most people research it backward.
Pick your footprint first. A full back covers shoulder to lower back; upper back work often centers on the shoulder blades; lower back pieces sit above the waistline; spine-centered designs use the vertebrae as a visual axis rather than covering the whole width.
Test the placement physically. Ask your artist for a paper transfer or hand-traced stencil, then check it under normal lighting, in a mirror, and while moving. A design that looks balanced standing still can shift awkwardly when you raise your arms or bend forward.
Check it against clothing and posture. Try the stencil under a tank top or swimsuit to see how much shows in daily life, since that’s often the real deciding factor between full and partial coverage.
Flag anatomy issues early. Shoulder blades create natural breaks in a composition, the spine gives a strong vertical anchor, and most bodies have subtle asymmetry between the two sides that a skilled artist will design around rather than fight.
Getting this right before the first session prevents the most common regret in large-scale work: a design that looked great on paper but reads oddly once it’s actually on a moving body.
Working With an Artist: Consultations, References, and Custom Design
A real consultation is where a good idea becomes a design that actually fits your body. Bring reference photos, note any past tattoos that need integration, and be upfront about your budget range and how flexible your schedule is for multiple sessions.
What you should bring to that first meeting:
Reference images for style and specific motifs, even if they’re rough
Photos of your back from a few angles, ideally in the lighting you’d wear it in
A realistic sense of your budget range and timeline
Notes on any skin sensitivities, past reactions to ink, or scarring
Custom-focused studios convert those references into an original sketch built around your spine, shoulder blades, and posture rather than resizing a stock design to fit. That’s the core difference between a template tattoo and bespoke work: one gets adjusted to your body, the other gets stretched onto it.
Pro Tip: Ask your artist directly how they handle shading transitions across multiple sessions. Consistency in gray tones or color saturation between session one and session four is one of the biggest quality tells in a finished back piece.
Before you commit, ask about session length, shop minimums, deposit policy, and whether the same artist will complete every session.
Sessions, Timeline, and Healing: Pacing a Large Back Piece
Large back pieces get built zone by zone, not in one sitting. Skin needs real recovery time before it can safely take another pass of needlework in the same area, which is why aftercare guidance for back tattoos treats healing windows as a scheduling factor, not just a comfort issue.
Typical pacing looks like this:
Session count: Most full back pieces run multiple sessions, though highly detailed color realism can require additional appointments.
Spacing: Artists usually leave 4 to 8 weeks between sessions on the same area to let skin fully heal.
Total timeline: A full back piece commonly takes several months to a year or more from first session to completion.
Healing isn’t just downtime between appointments. It’s what lets an artist assess how color and line work settled before adding the next layer, which is exactly how decorative back pieces are built to follow the body’s natural lines without visible seams between zones.
Pain and Cost: Where It Hurts and How to Budget
Pain on the back varies a lot by zone. The spine, ribs, and the bony edges of the shoulder blades tend to hurt more because there’s less muscle and fat cushioning the needle. Fleshier areas like the mid and lower back, where more muscle sits under the skin, are generally more tolerable through longer sessions.
Cost depends on more than square inches:
Hourly rates: Most studios charge by the hour or by the day for large-scale work, and rates vary by artist experience and region.
Color vs. black & grey: Color work typically adds session time and cost due to layering.
Complexity: Fine detail, portraiture, and dense backgrounds all add hours.
Artist reputation: In-demand artists often command higher rates and longer waitlists.
Budget in stages: cover your deposit and first session comfortably, then set aside funds for follow-ups rather than trying to save for the whole project upfront.
How Posture and Movement Affect the Final Design
A back piece never sits still the way it does on a stencil. Raising your arms, bending forward, or twisting at the waist stretches and compresses skin across the shoulder blades and spine, which shifts how motifs align relative to each other.
Good composition anticipates this by anchoring key elements to stable landmarks, like the spine or shoulder blade ridges, and using flowing lines (waves, smoke, vines) that still read cleanly when the surface moves. For longevity, keep tattooed skin away from repeated friction (backpack straps, tight bra bands) and out of direct sun once healed, since UV exposure fades detail faster than almost anything else.
Aftercare and Long-Term Care for a Back Piece
Healing a back piece takes more coordination than a small tattoo simply because you can’t easily see or reach the area yourself.
Clean gently, twice a day, using fragrance-free soap and lukewarm water, then apply a thin layer of the ointment your artist recommends.
Sleep on your side or stomach for the first week or two, and wear loose, breathable clothing that won’t rub against fresh ink.
Protect the area between sessions with daily sun protection once healed, since UV exposure breaks down pigment over time; a barrier repair routine can help skin recover faster between passes.
Contact your artist for touch-up questions, but see a doctor if you notice spreading redness, fever, or pus, which point to infection rather than normal healing.
Why a Bespoke Studio Approach Matters for Large-Scale Work
Soulkraftink builds every back piece as an original composition, with no templates and no repeated designs between clients. That matters most on large-scale work, where a stock design stretched to fit rarely accounts for an individual’s shoulder width, spine curve, or asymmetry the way a body-aware sketch does.
The studio’s artists work across color realism, blackwork, fine line, and large-scale projects, which means the same team that sketches your concept can also execute it consistently across every session. That continuity, paired with a collaborative design process, is what keeps a multi-session back piece looking like one cohesive artwork instead of several disconnected sittings. It’s also what turns a tattoo from decoration into something closer to a lasting, personal record.
Getting Ready: What to Do in the Days Before Your Appointment
Skin condition on appointment day affects how smoothly a session goes, especially on larger areas where an artist needs consistent, healthy skin to work across for hours.
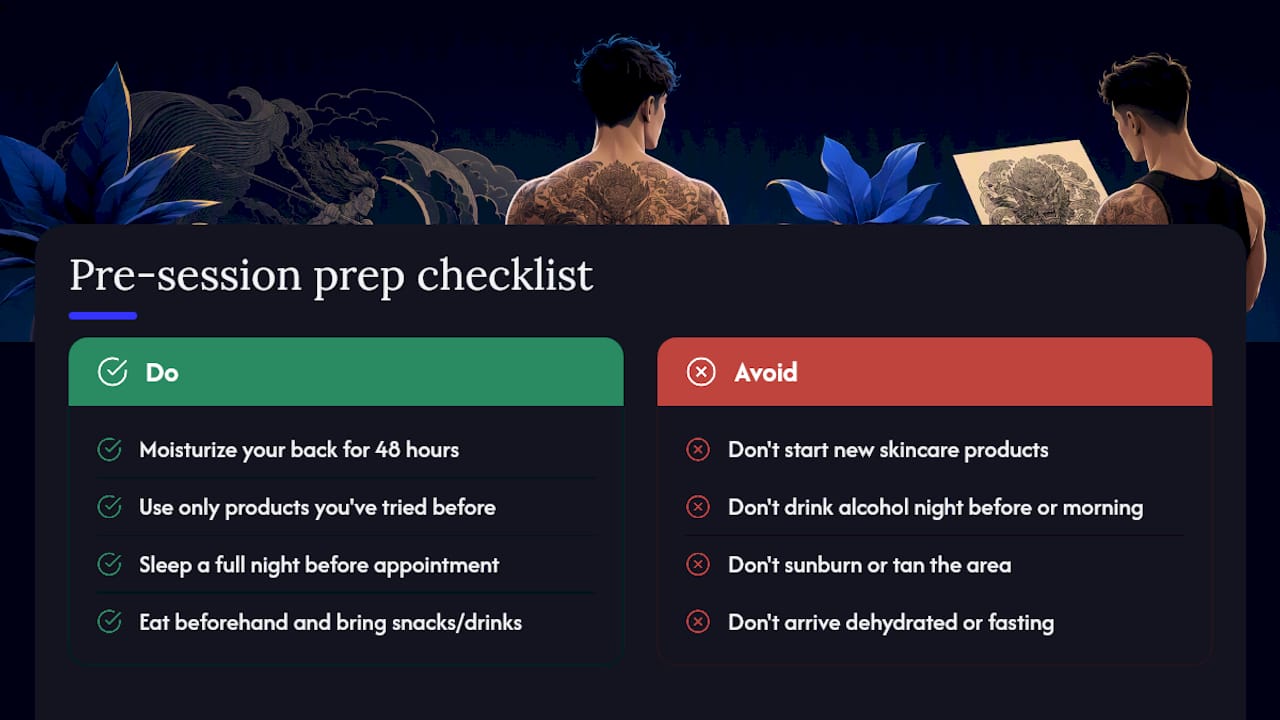
In the 48 hours before your session, keep your back moisturized but avoid new products you haven’t used before, since a reaction on session day complicates things unnecessarily. Skip alcohol the night before and the morning of. Alcohol thins blood and can make you bleed more during tattooing, which pushes ink out instead of letting it settle properly.
Sleep matters more than people expect. A full night’s rest the night before helps you tolerate a multi-hour session and keeps your nervous system less reactive to pain. Eat a real meal within a few hours of your appointment, and bring snacks or a drink if your session runs long. Low blood sugar during a three-hour sitting makes people lightheaded, and that’s a session-ending problem your artist would rather avoid.
Hydration also affects how your skin behaves under the needle. Well-hydrated skin takes ink more evenly and heals faster, so drink water consistently for a day or two beforehand rather than chugging a bottle right before you walk in. Avoid excessive sun exposure or tanning on the area in the week leading up to your appointment, since sunburned or freshly tanned skin is more sensitive and harder to work on cleanly.
Wear or bring clothing that gives your artist easy access to your back without you needing to stay half undressed for hours in a cold studio.
What to Wear for Sessions and During Healing
Clothing choices matter more for a back piece than almost any other placement, mainly because access and healing both depend on what’s touching the skin.
For the session itself, choose something that opens from the front or unzips completely, like a button-down shirt or a zip-up hoodie you can drape over your shoulders. Avoid anything you’d need to pull over your head afterward, since fresh tattoos are tender and stretching fabric over them right after a session is uncomfortable and can disturb the area.

During healing, loose cotton tops are your best option. Tight shirts, sports bras with wide bands, and backpacks with structured straps all create friction exactly where you don’t want it, right over healing skin. If you normally wear a bra, look for soft, wireless styles without bands that cross the tattooed area, or skip it entirely at home when possible during the first couple of weeks.
Bedding matters too. Cotton sheets breathe better than synthetic blends and reduce the chance of the tattoo sticking to fabric overnight, which can pull at forming scabs. If you sleep on your back normally, plan on side or stomach sleeping for a while, and consider an old pillowcase you don’t mind getting ointment on during the first few nights.
Common Risks and How to Reduce Them
Two risks come up most with large-scale tattoos: infection and allergic reaction, and both are largely preventable with the right precautions.
Infection risk goes up with the sheer surface area involved and the number of sessions over which skin stays vulnerable. Reduce it by following your artist’s cleaning schedule exactly, avoiding pools, hot tubs, and open water until fully healed, and never picking at scabs no matter how tempting that itch gets.
Allergic reactions are less common but real, usually tied to specific pigments (red and certain colored inks trigger this more often than black) or to aftercare products themselves. If you have known sensitivities or eczema-prone skin, mention it during your consultation so your artist can choose pigments accordingly, and consider patch-testing aftercare products before applying them across a large healing area.
Watch for warning signs that go beyond normal healing: spreading redness, swelling that gets worse instead of better after day three or four, fever, or pus with an odor. Normal healing itches and flakes; infection escalates. When in doubt, a quick photo sent to your artist or a same-day visit to urgent care beats waiting it out.
What Actually Matters When Planning a Back Piece
Most advice on back pieces treats inspiration and planning as two separate phases: browse galleries first, figure out logistics later. That order is backward, and it’s why so many people end up with designs that look great as a reference image but fight their own body once it’s actually tattooed.
The style you love matters less than whether it can be built to follow your spine, your shoulder blades, and how your back actually moves. A mediocre composition in a stunning style still reads as mediocre once it’s on skin for good. What the research on multi-session projects makes clear is that healing time isn’t wasted time. It’s structural to how well zones connect once the whole piece is finished.
If there’s one thing worth prioritizing above style preference, it’s finding an artist who treats your consultation as design work, not paperwork. That’s where asymmetry gets caught, where session pacing gets set realistically, and where a back piece stops being a list of images and starts being one composition.
— Kyle
Ready to Plan Your Back Piece? Book a Consultation
A bespoke tattoo studio builds every large-scale back piece from scratch, with no templates and no repeats, so the design you leave with is composed specifically for your body rather than resized to fit it. That’s the real advantage over working from a flash sheet: your spine, shoulder blades, and posture become part of the planning conversation from session one.
Sessions run on an hourly or all-day basis, with a shop minimum applied to smaller add-ons, and pricing is discussed directly during your consultation based on size, style, and complexity. Bring your reference images, a realistic sense of your timeline, and questions about shading approach or color choices. If you’re ready to start, reach out through the studio’s inquiry page to get a session scheduled and begin the design conversation.
Sources
For deeper detail on back tattoo aftercare and multi-session healing timelines, see Guide to back tattoo aftercare and 50 Insane Full Back Tattoo Ideas.
FAQ
What Is a Back Piece Tattoo?
A back piece tattoo is a large-scale design covering part or all of the back as one connected composition, rather than several unrelated smaller tattoos. It ranges from upper-back or lower-back sections to full coverage spanning shoulder to waist, and it’s typically completed across multiple sessions rather than in a single sitting.
How Painful Is a Back Piece Tattoo?
Pain varies significantly by zone. The spine, ribs, and the bony edges of the shoulder blades tend to hurt more because there’s less cushioning, while fleshier areas across the mid and lower back are generally more tolerable during long sessions.
How Much Should a Back Piece Tattoo Cost?
Cost depends on size, color complexity, detail level, and artist rate rather than following one fixed number. Soulkraftink prices large-scale work by the hour or by the day session, with rates and a shop minimum discussed directly during your consultation.
How Big Is a $400 Tattoo?
At typical hourly rates, 200 to 300 USD per hour generally covers a couple of hours of work, which is enough for a small to medium single-session piece but rarely enough for meaningful progress on a full back composition. Large-scale work is priced and scheduled across multiple sessions rather than as one flat quote.
Comments